
Article content
Introduction
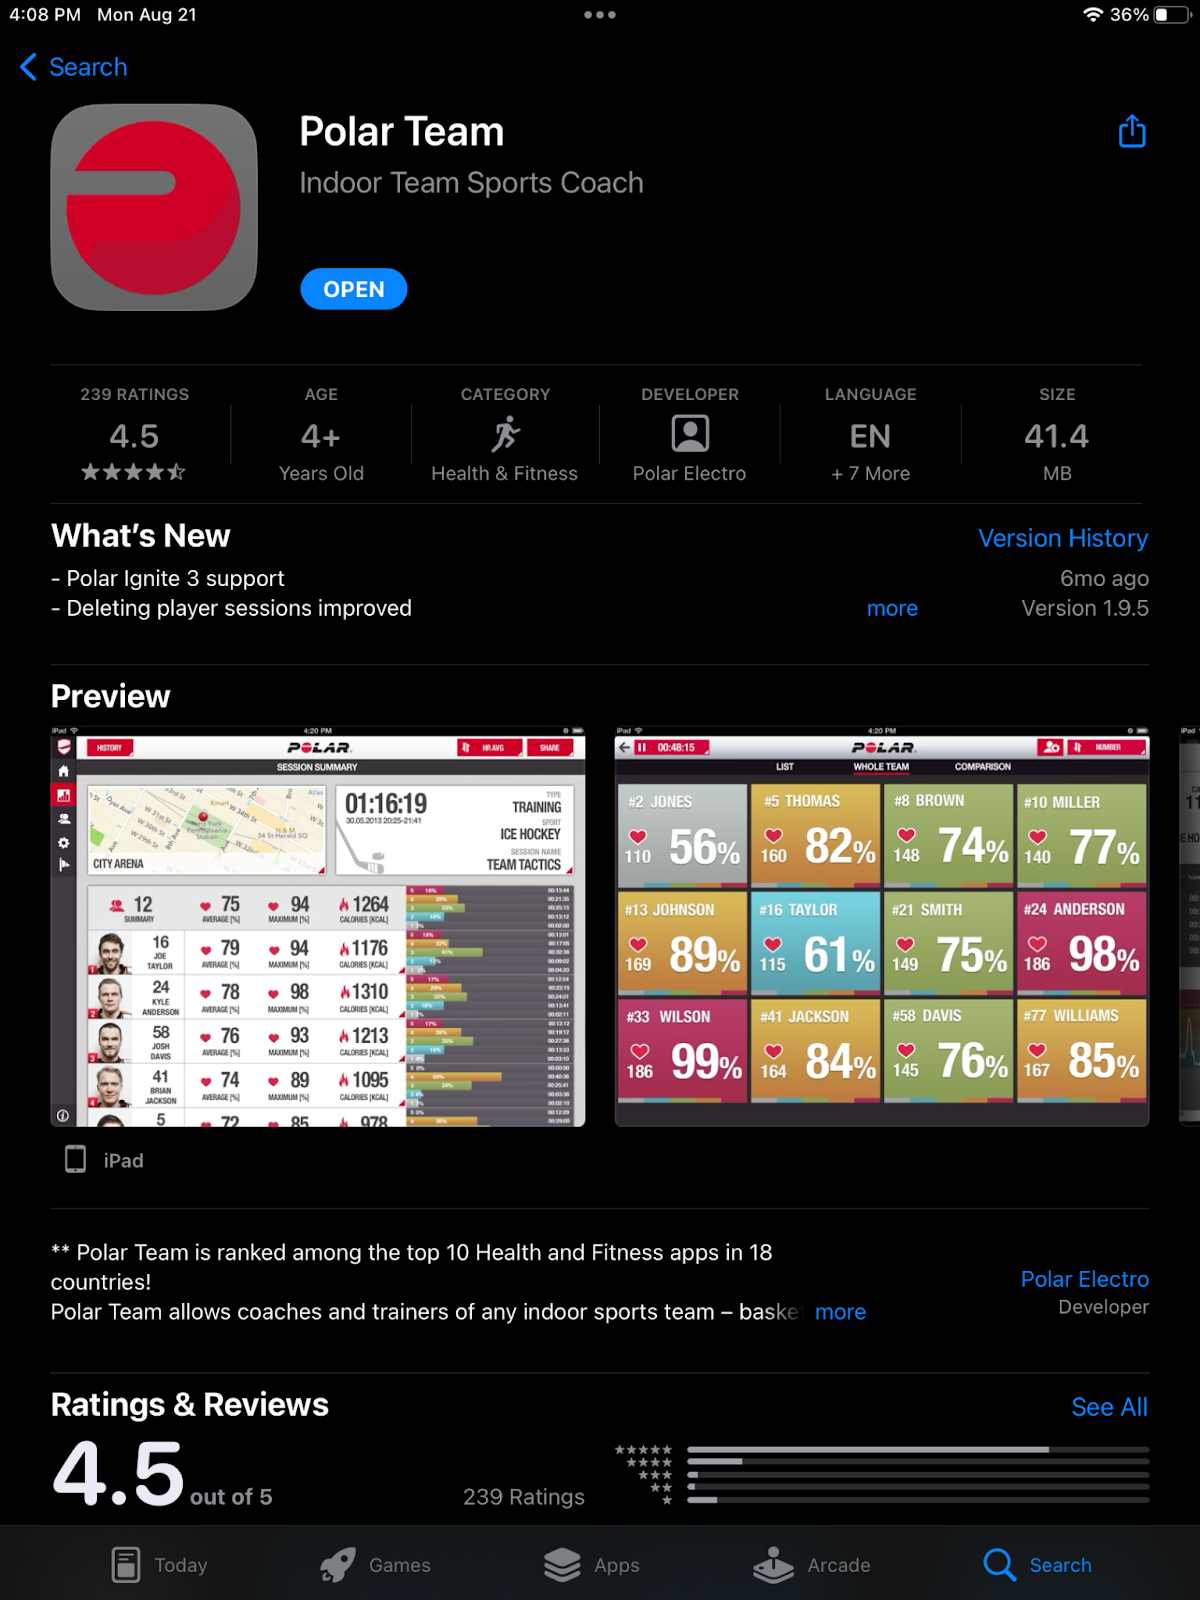
In the world of competitive swimming, tracking performance is essential for both coaches and athletes. Integrating technology into training sessions allows for precise monitoring, analytics, and personalized coaching. The Polar Team App, designed specifically for iPad, provides a seamless way to monitor heart rate and other essential metrics using the Polar Verity Sense device. In this blog post, we'll walk you through the step-by-step process of setting up the app and pairing it with your team. Get ready to take your training to the next level!
Step 1: Download Polar Team App
Download Polar Team App from the App Store. This is an iPad only app. You will need an iPad with iPad OS 12.0 or a later version. iPad OS 12 was released in 2018, any iPad around 2016 or newer should work. Please check your iPad OS software before getting started.
Step 2: Enable Bluetooth for Polar Team App
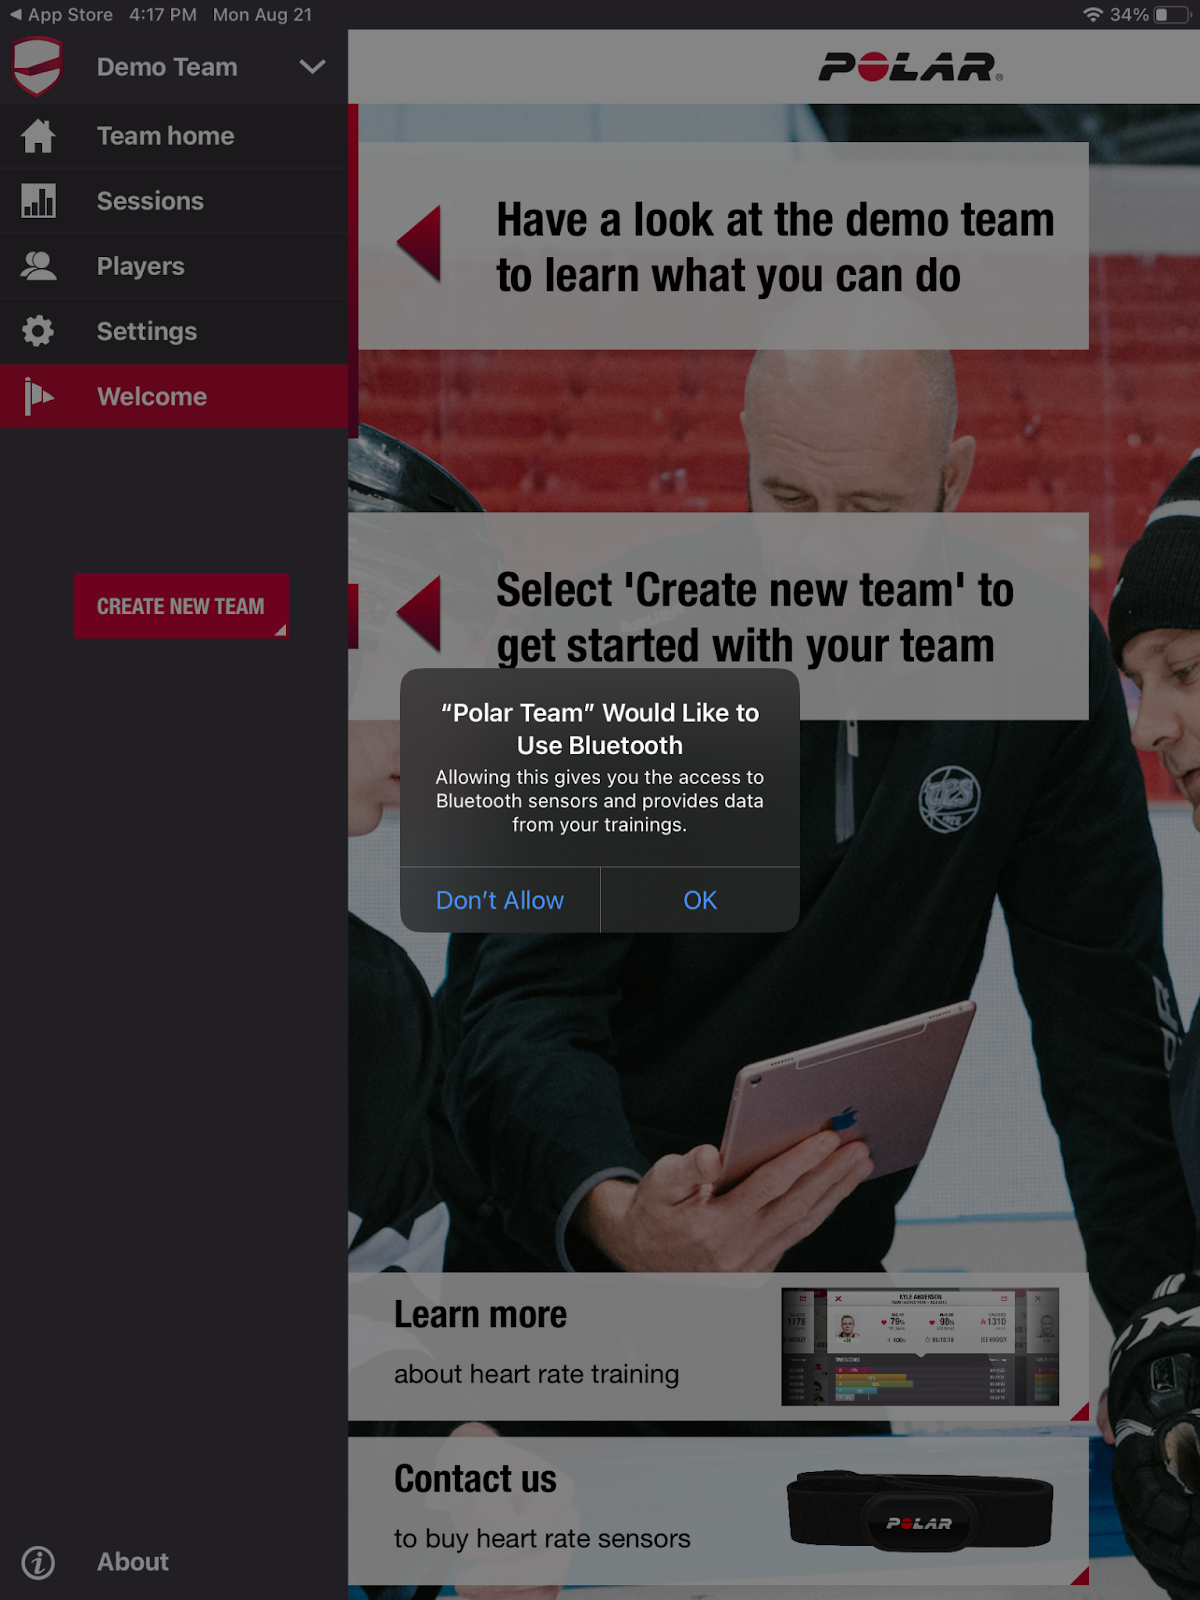
Enable Bluetooth to be used by Polar Team App. When you first open the Polar Team App, you should see a pop up message about Bluetooth. Please hit “OK” and continue with team set up. (Please see picture for reference)
Step 3: Create Your Team
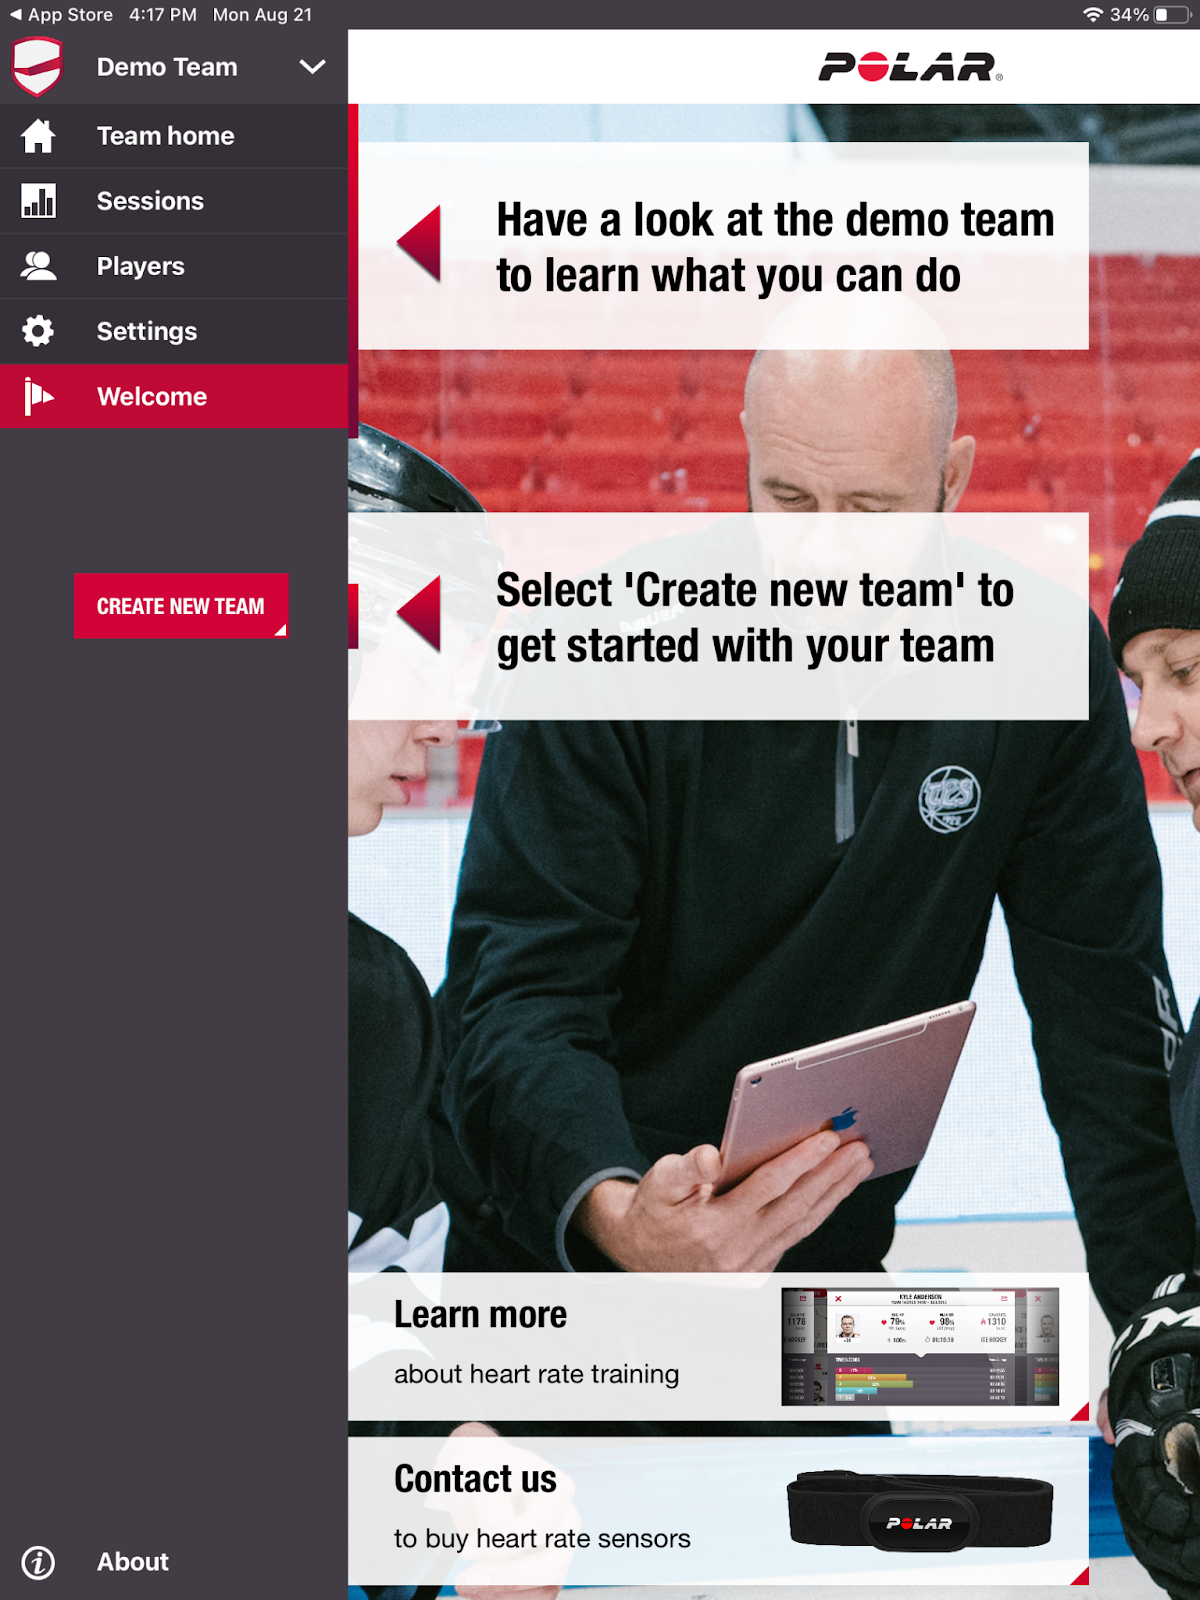
In the first screen you see when opening the app, you will have the option to view the Demo team Polar has for you to explore. The team is called “Demo Team” and you will not be able to delete this team from your dashboard. Under the message about exploring the demo team, you will see the option to “Create New Team”. Please click this to get started.
Step 4: Set Up Your Team Information
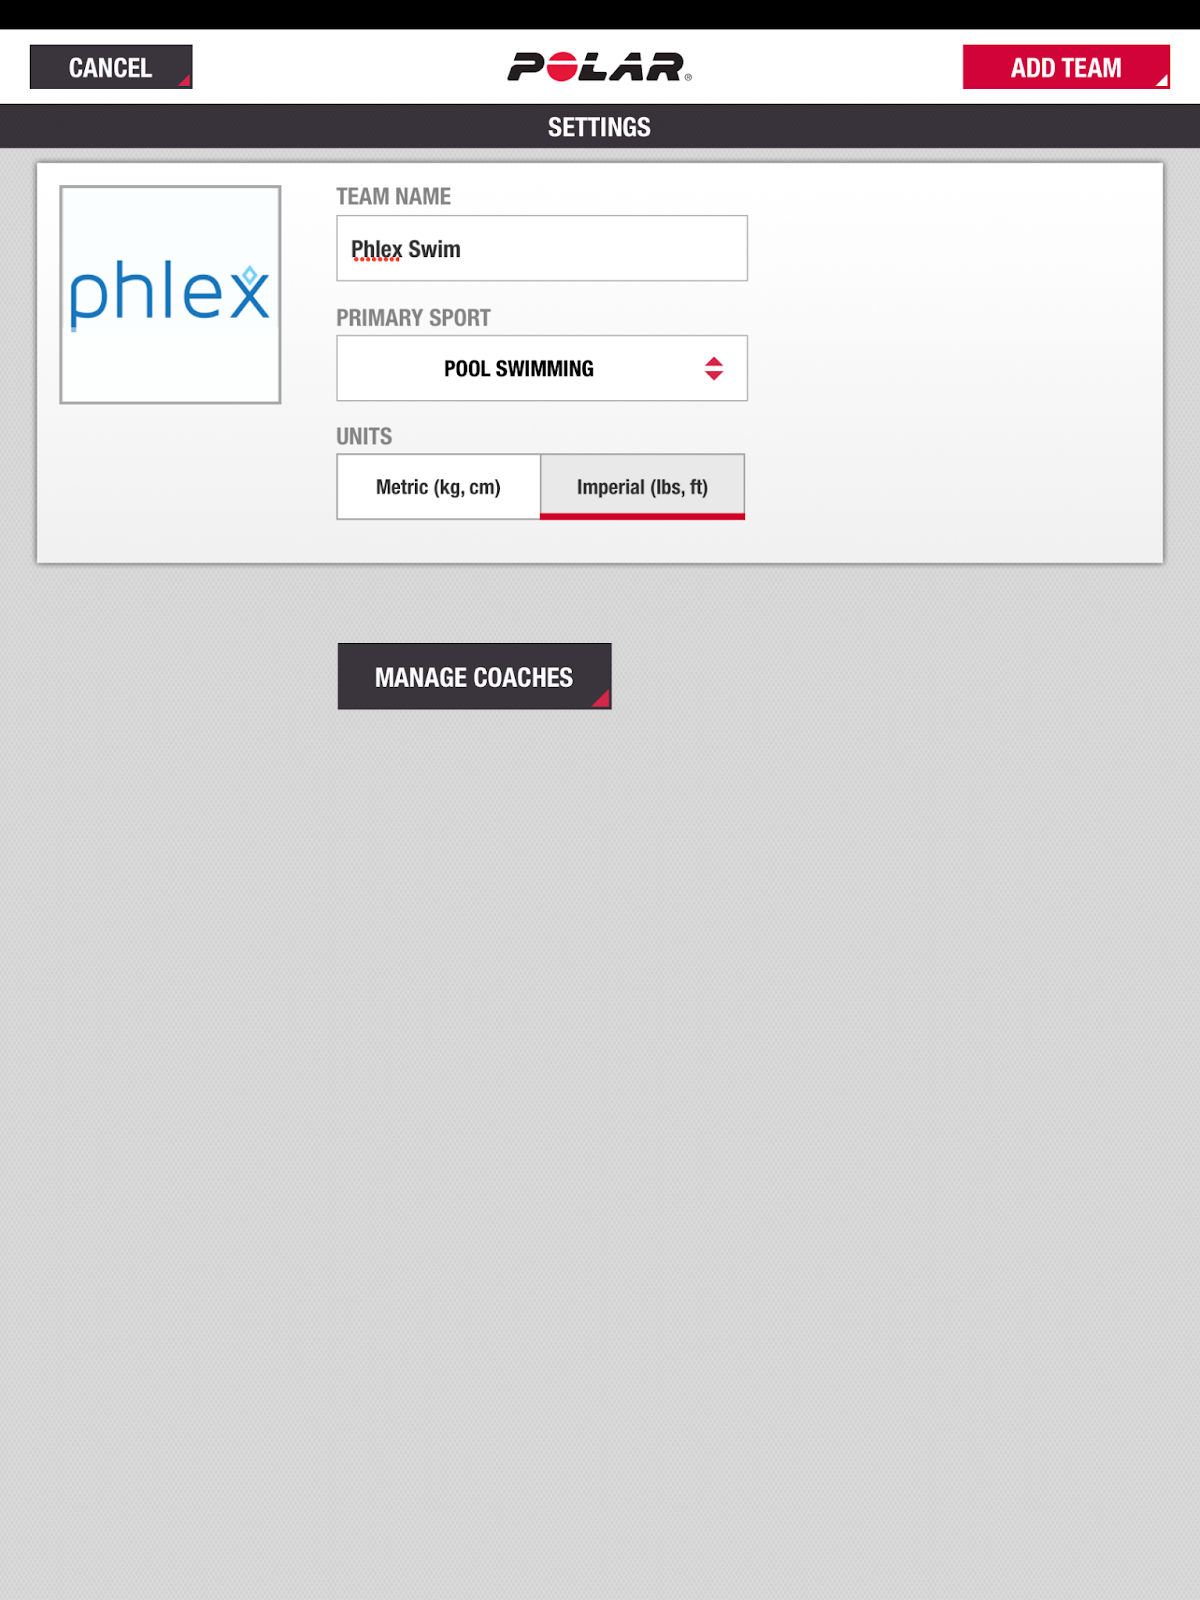
After clicking “Create New Team”, you will be taken to a page to set up your team information. Name your team, and then select the primary sport “Pool Swimming” from the drop down menu. Also select what Units you would like to use when adding Players to your team.
Step 5: Manage Coaches
At the bottom of the team set up screen, you will have the option to “manage coaches”. Here, you will be able to add coaches to your team. This step is not required, as the full functionality of having multiple coaches on your team is a feature in the paid Polar Team Pro app. After clicking “Manage Coaches”, you will be able to add a coach. Add as many coaches as you would like. Press “Done” in the upper right hand corner when you are done.

Step 6: Confirm Team and Coaches’ Information
Confirm your team and coaches’ information. Select “Add Team” in upper right hand corner.

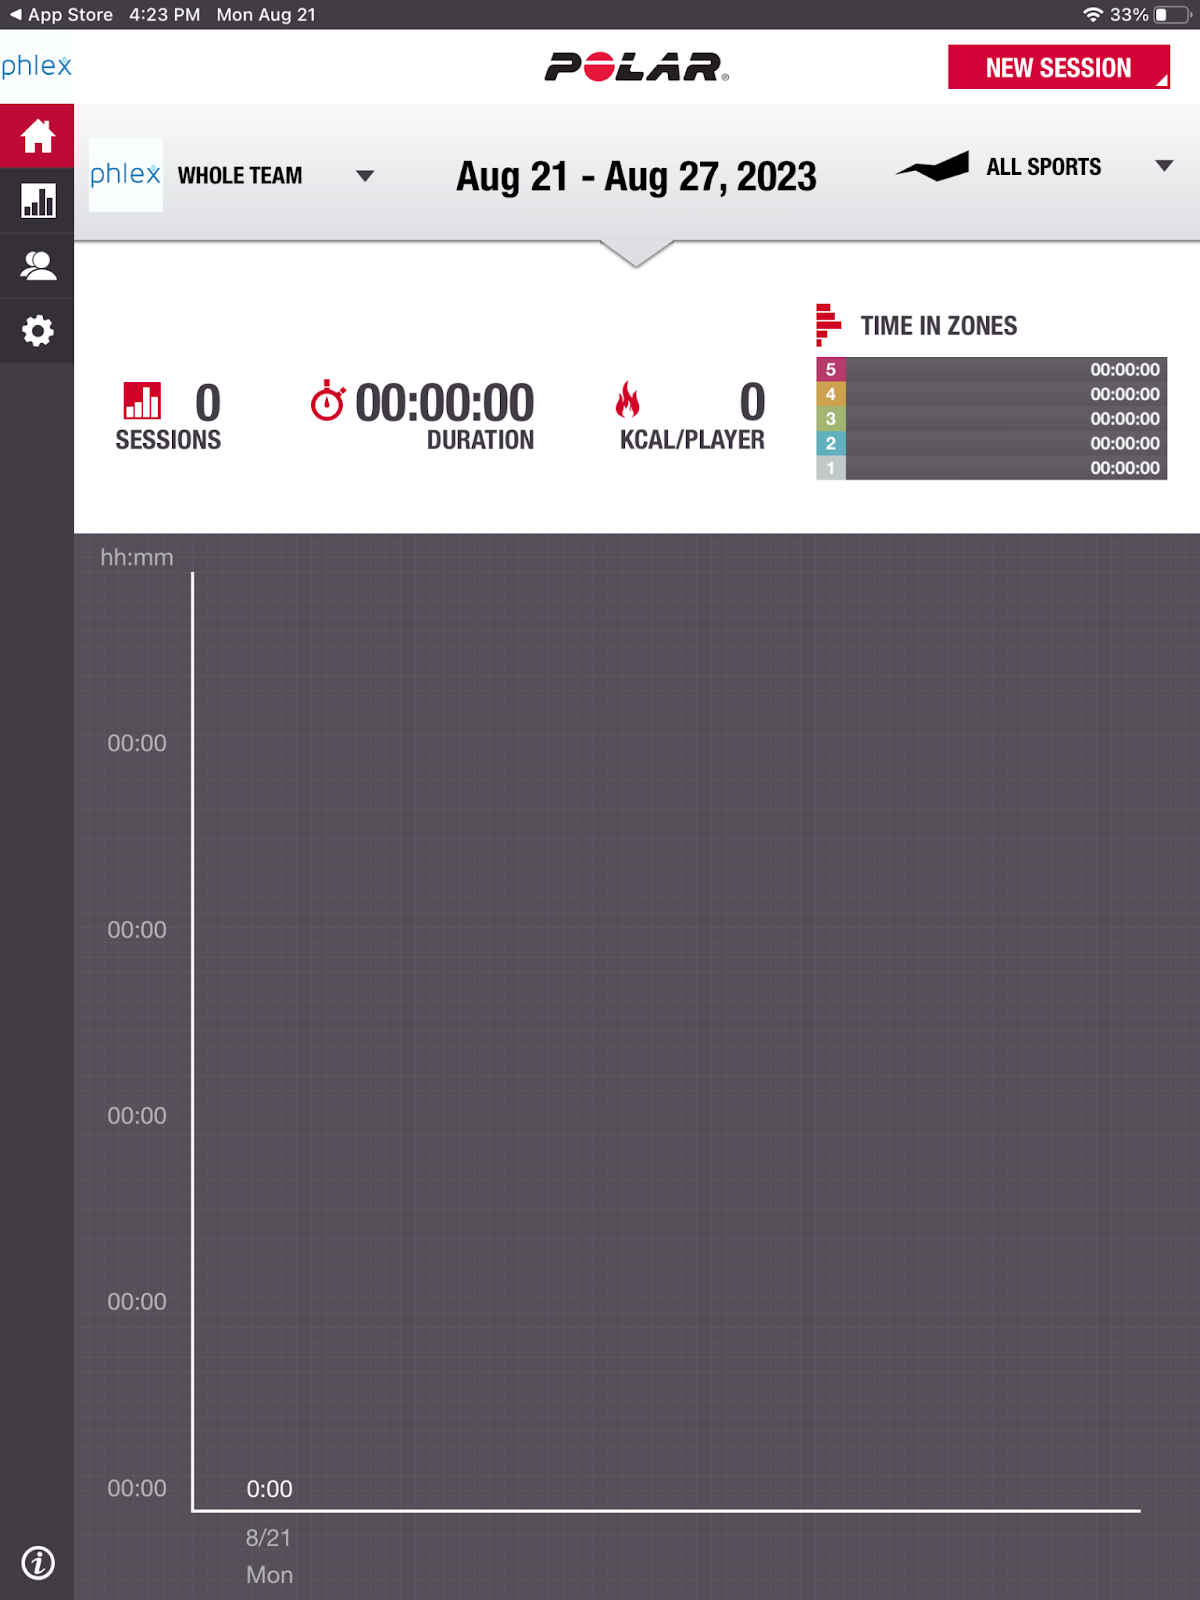
Step 7: Your Team Dashboard
You will see a grey screen that says “0 sessions”. This is because you have not recorded any sessions with your team yet. In the left hand sidebar, you will see 4 options. From top to bottom, “Home”, “Session Summary”, “Players” and “Settings”. Please select the Players icon to add swimmers to your team. Select “Manage Players” then “Add New Player”.

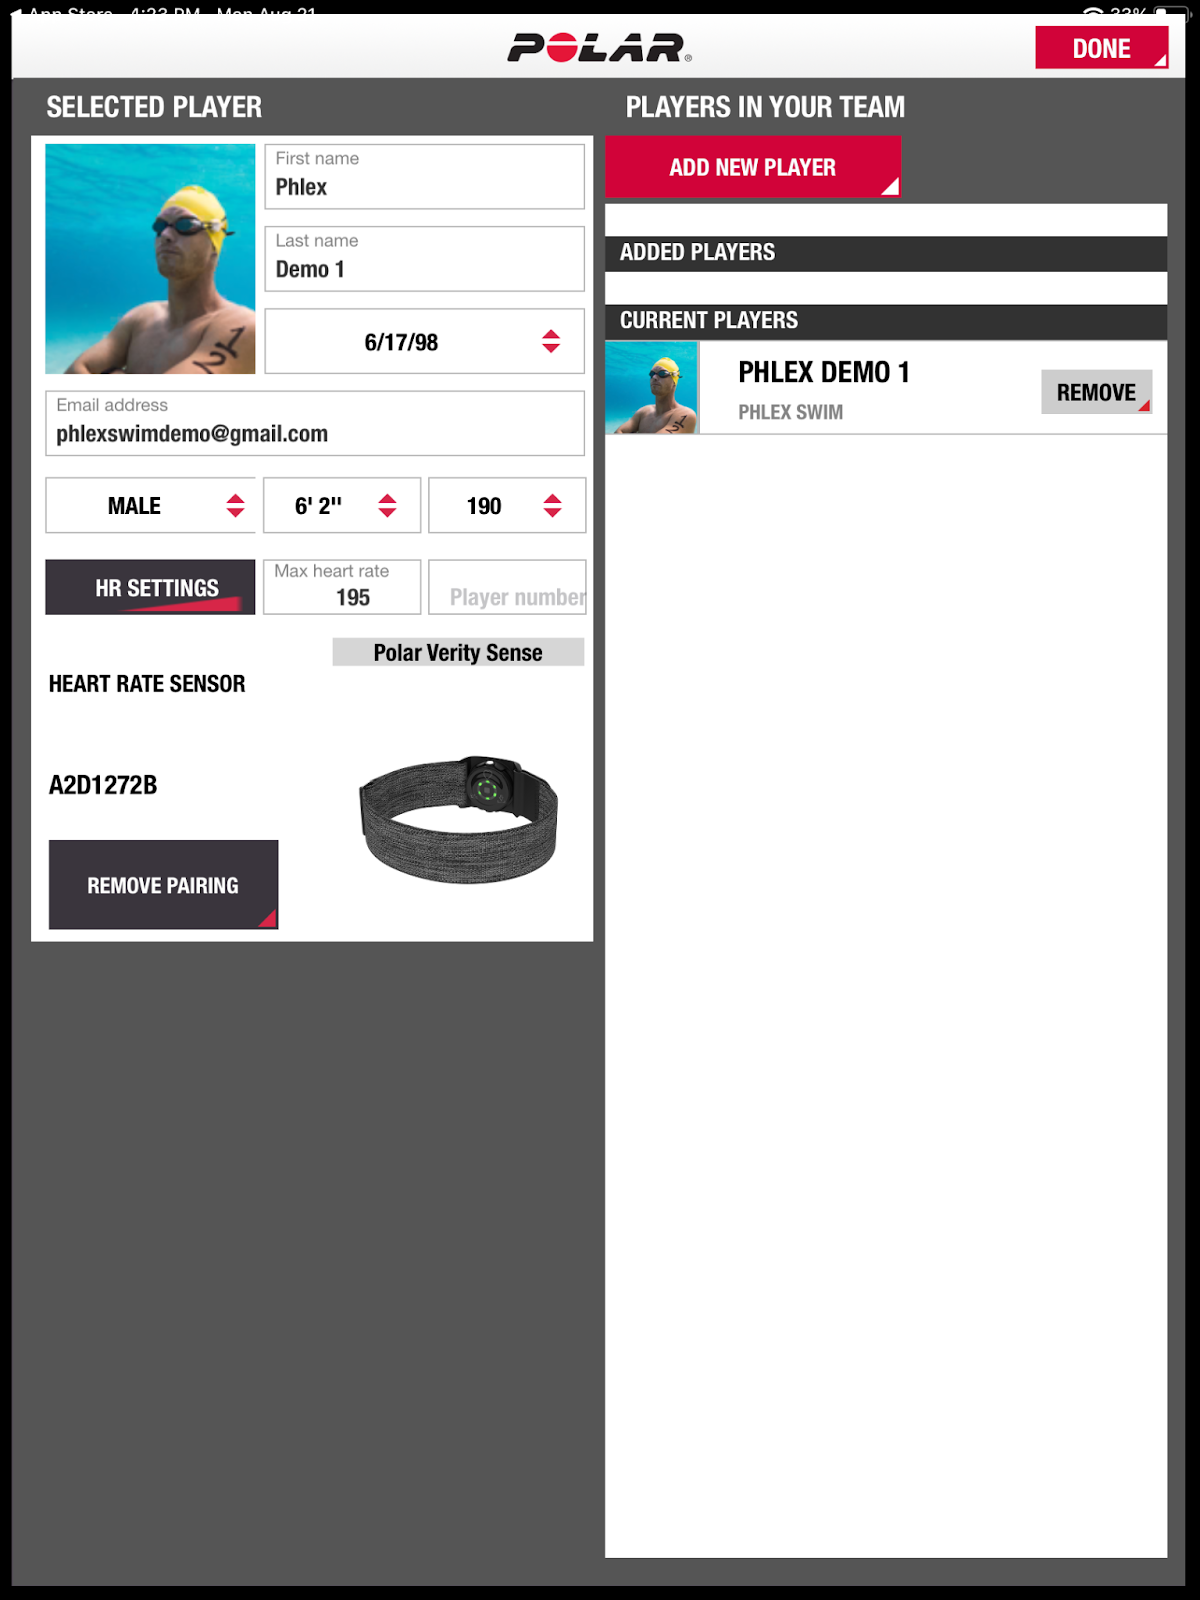
Step 8: Add Player Information
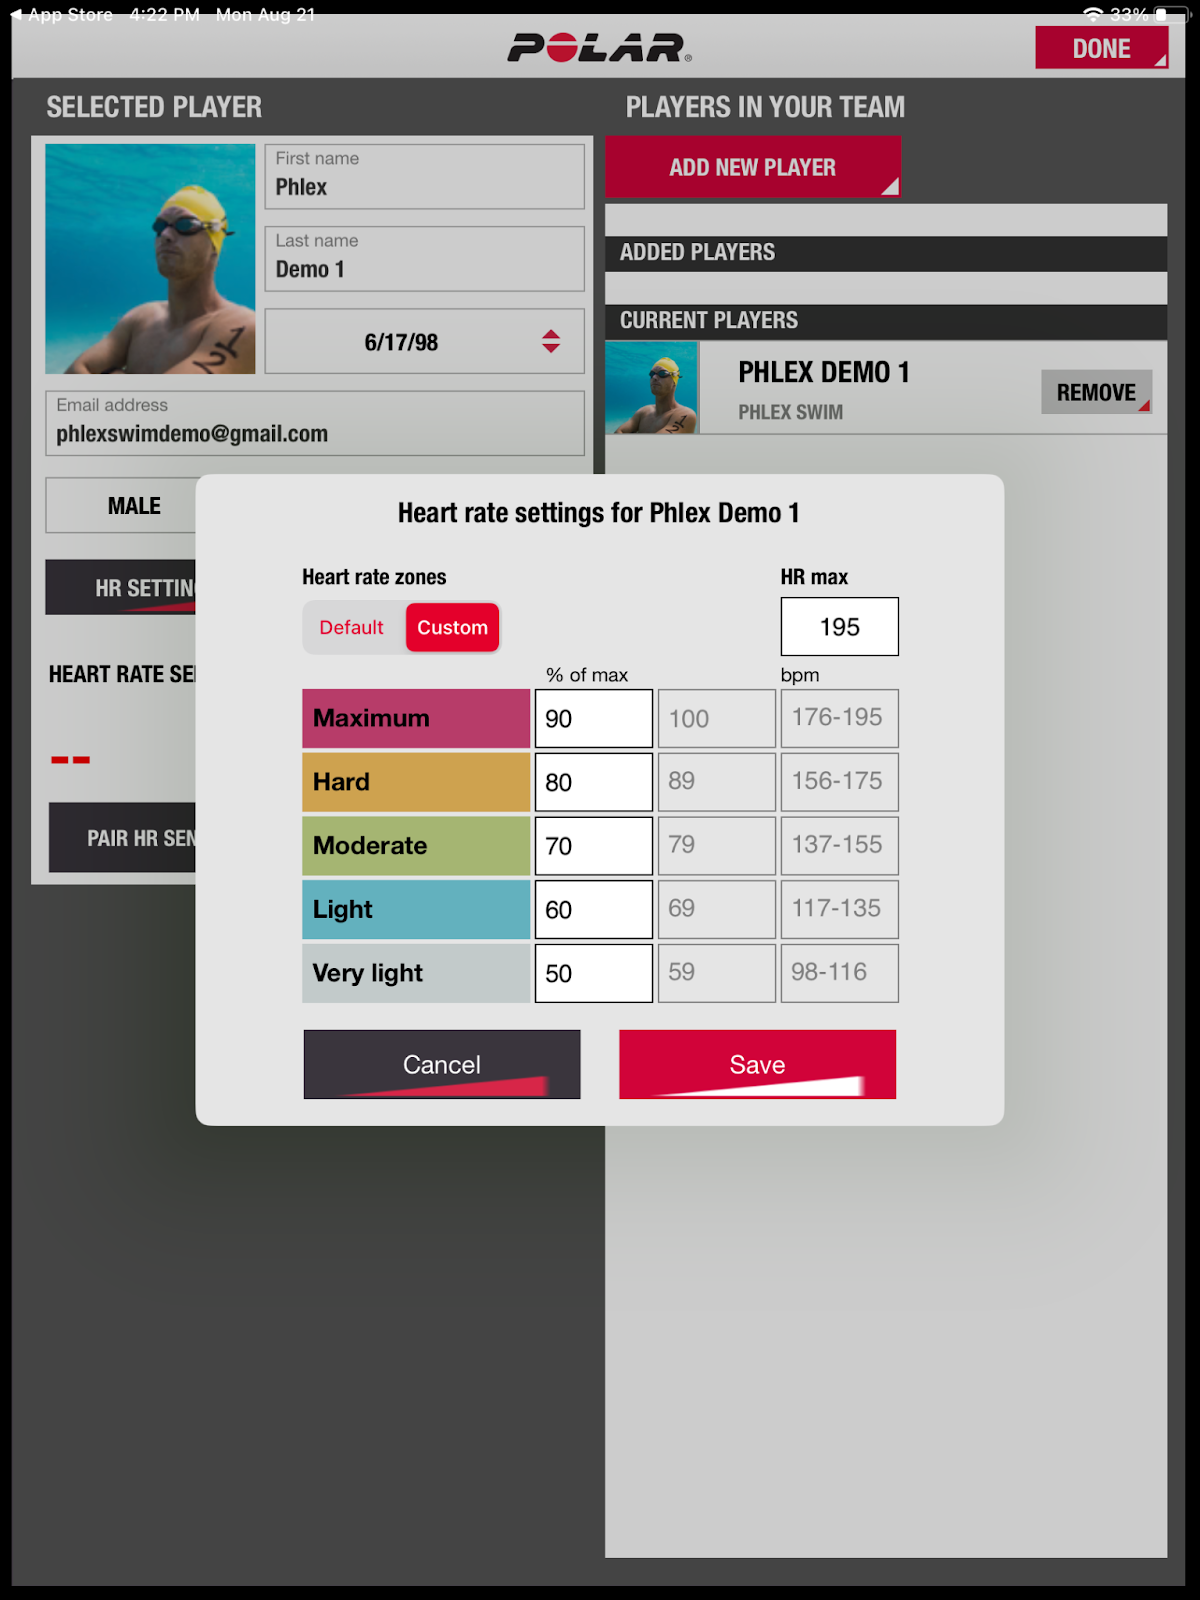
Add information for the first player on your team. The Max Heart Rate will change based on the player’s birthdate. You will have the option to manually select max heart rate and heart rate zones. After inputting information, select “HR Settings”. You can use the default settings from Polar, or select Custom to adjust them to your athlete’s Phlex Zones. Hit “Save”.
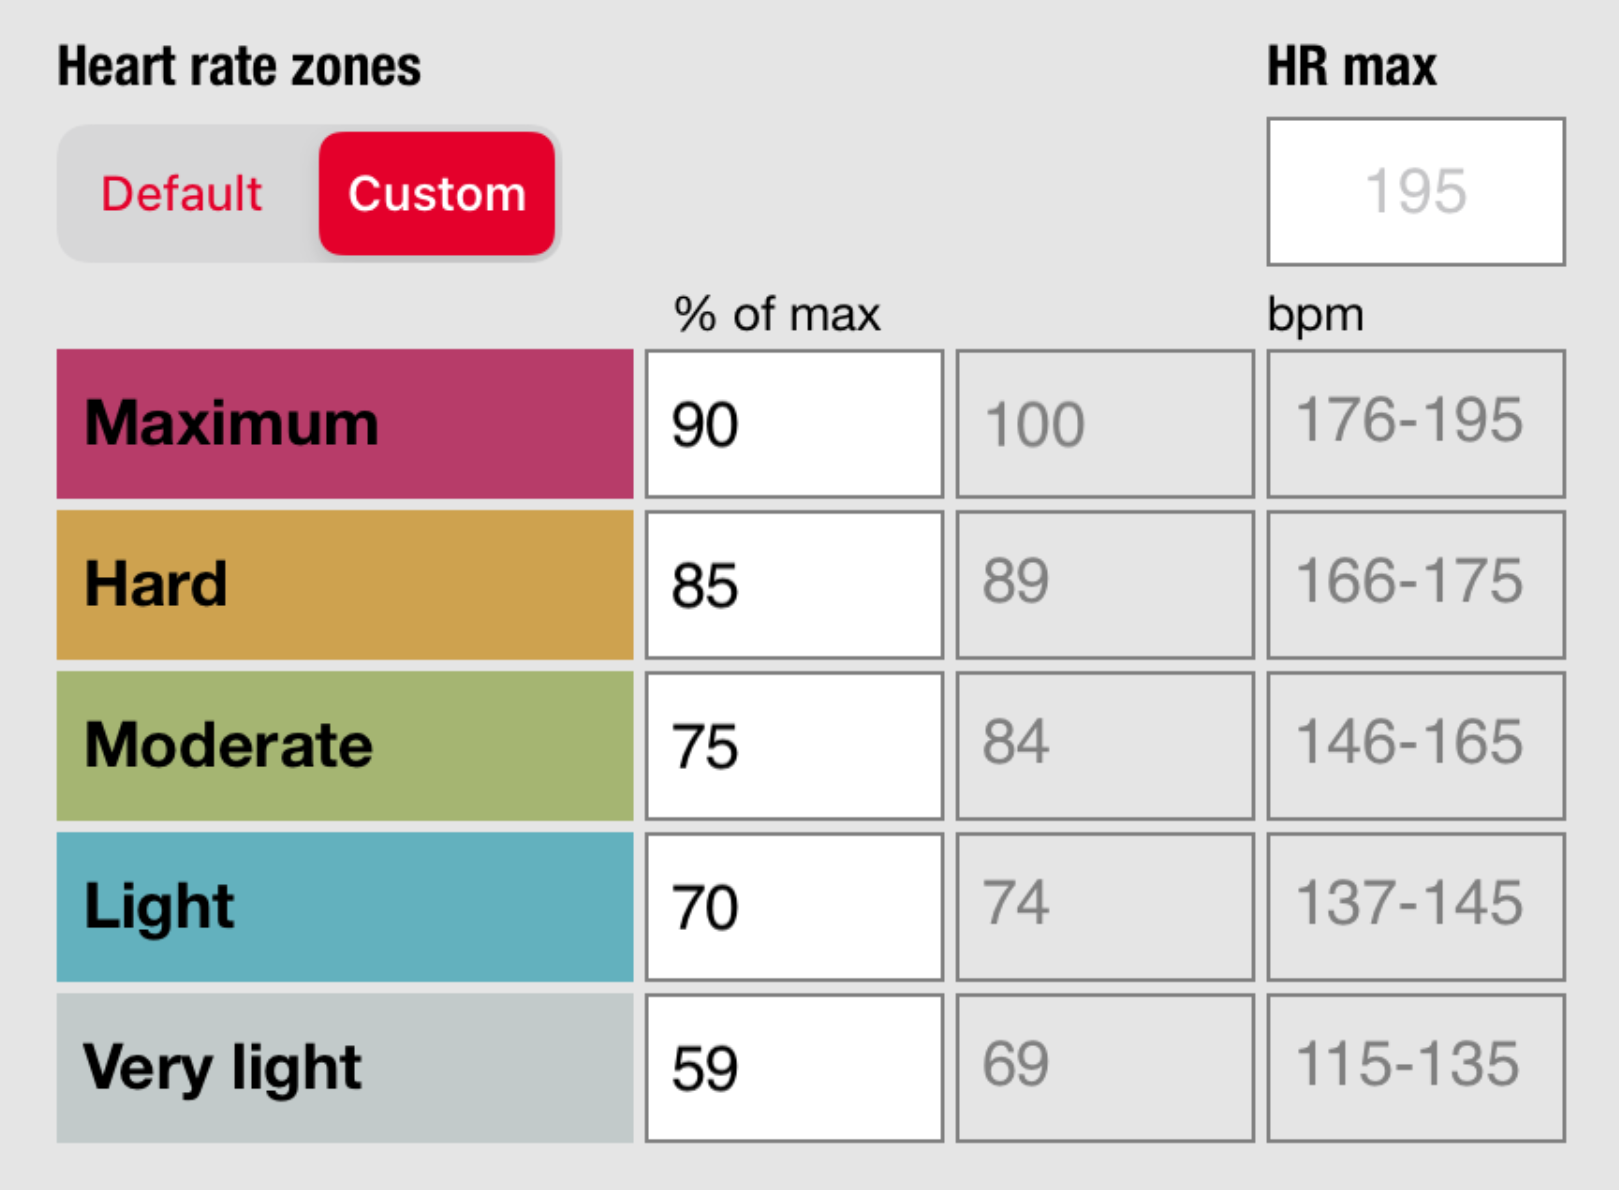
Below is the birthdate chart with suggested zones Phlex uses:
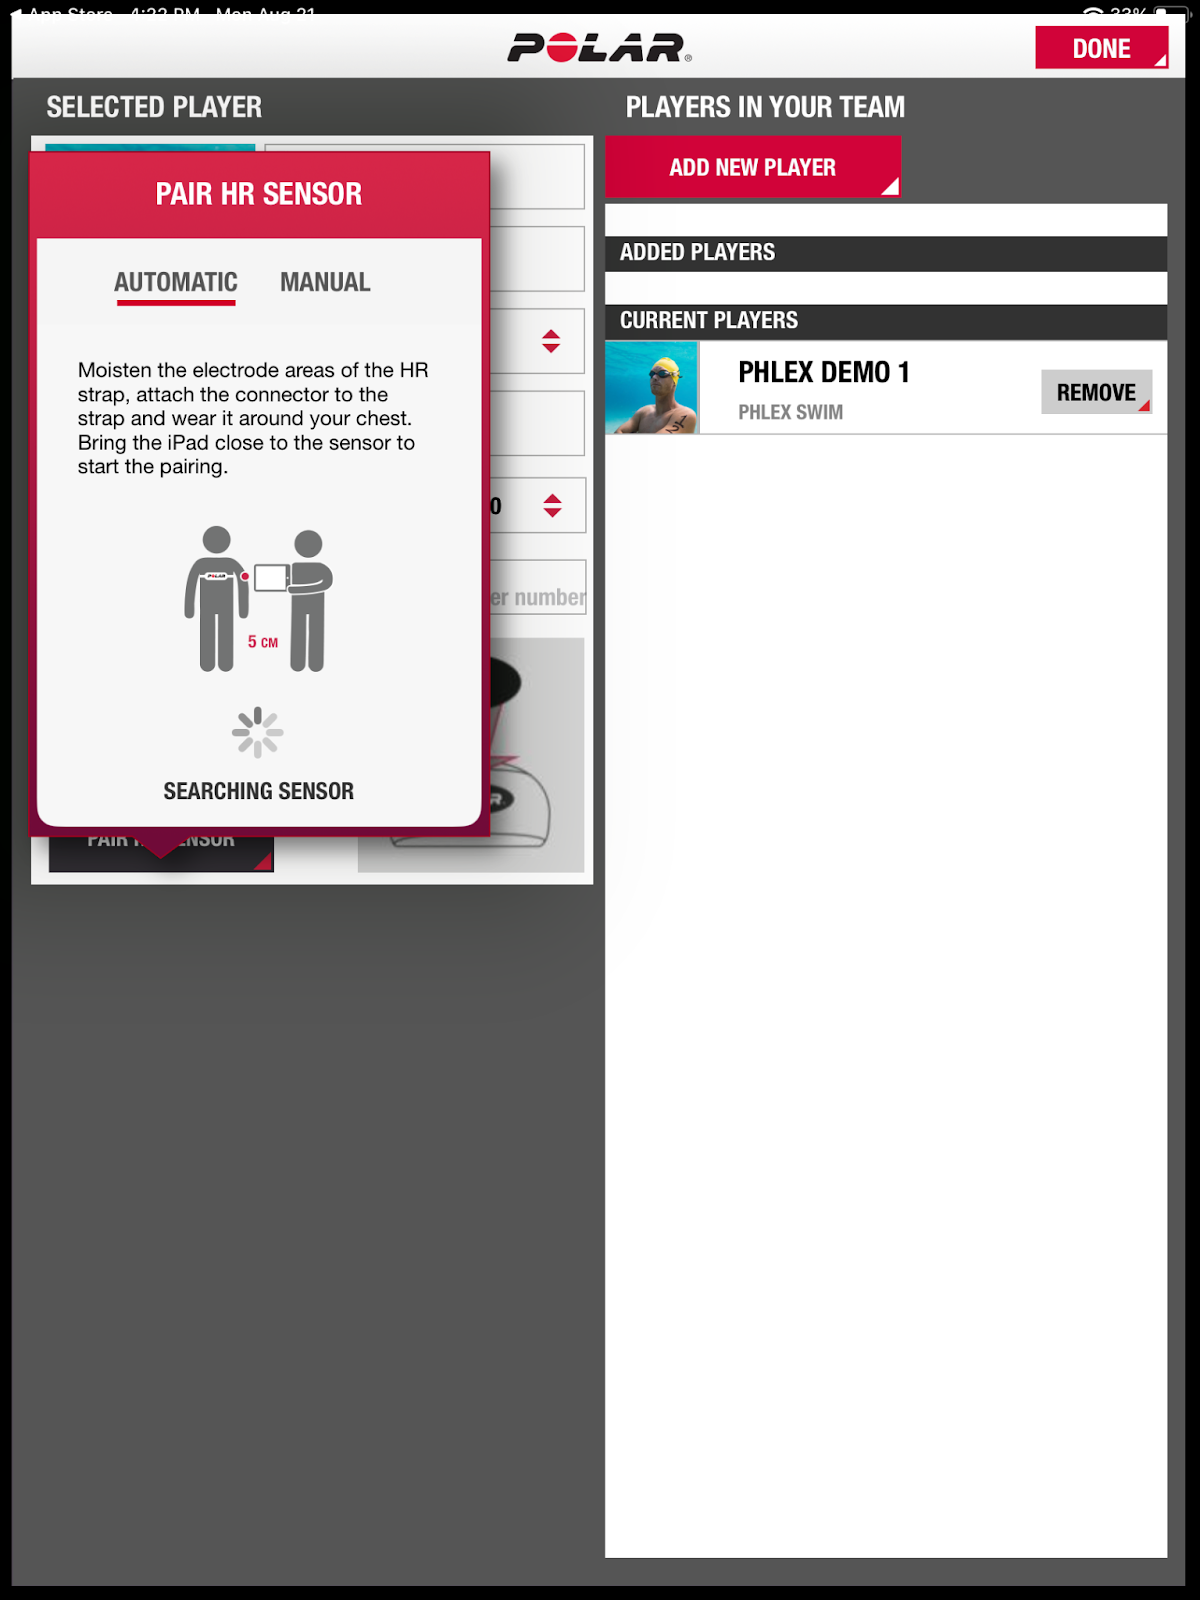
Step 9: Pair a Polar Verity Sense Device
Pair a Polar Verity Sense device with your first player’s profile. Select “Pair HR Sensor” and make sure the player’s Polar Verity Sense is within Bluetooth reach. If multiple sensors are on, please make sure the one you are trying to pair is extremely close to the iPad. Polar suggests 5 CM as you can see while pairing. Let the “Automatic” pairing connect. If this is not successful, please select Manual and proceed to the next step.
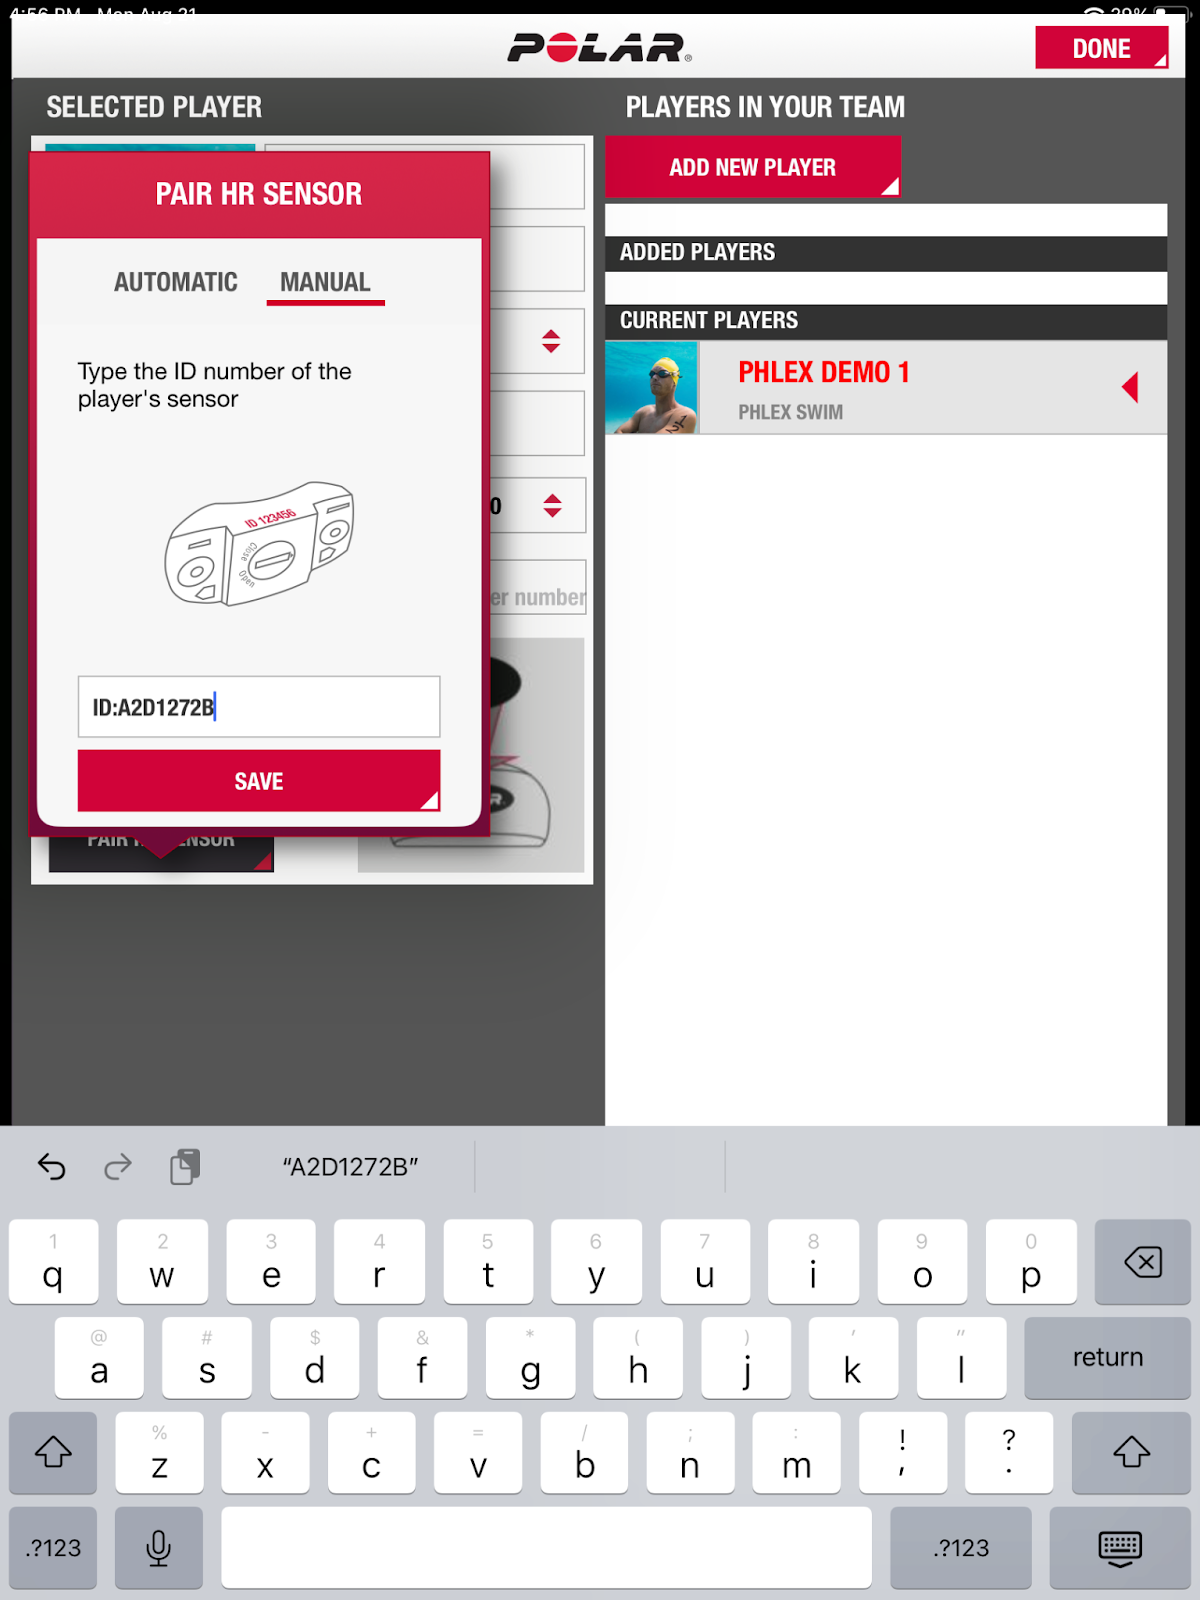
Step 10: Manual Connection (if needed)
(Ignore if step 9 was successful). Manually connect a Polar Verity Sense to the iPad Polar Team App. Instead of Automatic, please select Manual in the Pair HR Sensor Screen. Type the Polar Verity Sense ID that this player will use, then hit Save. The ID can be found on the side of the Verity Sense, it is an 8 digit code of letters and numbers.
Step 11: Add More Players
Double check that the sensor that is paired with the player matches the ID of their Polar Verity Sense. Select Add New Player to add more swimmers to your team. Hit “Done” when you are finished adding players to your team. You will see every player you have added under Added Players and the player you are currently setting up under Current Players.
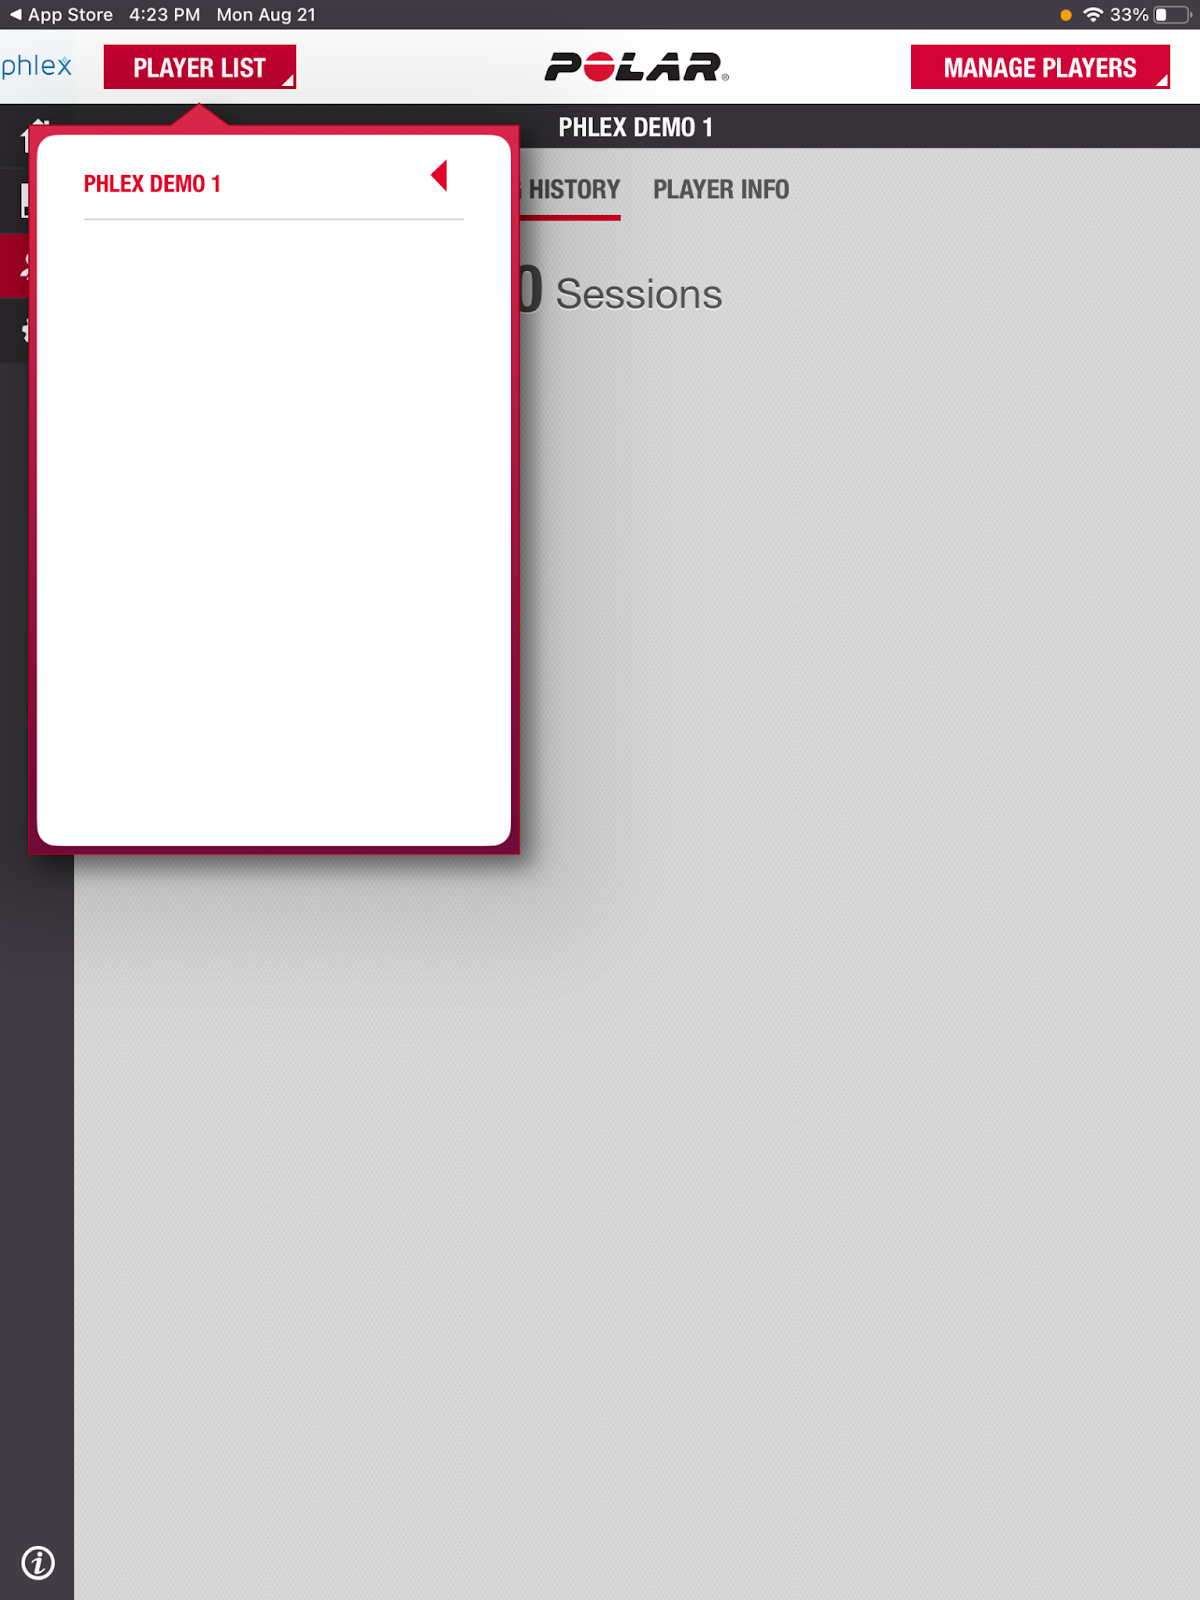
Step 12: View Player Training History
After recording a session, under the Players tab in the sidebar, you will be able to view every player’s training history. You will also be able to view/select players if you hit “Player List”.
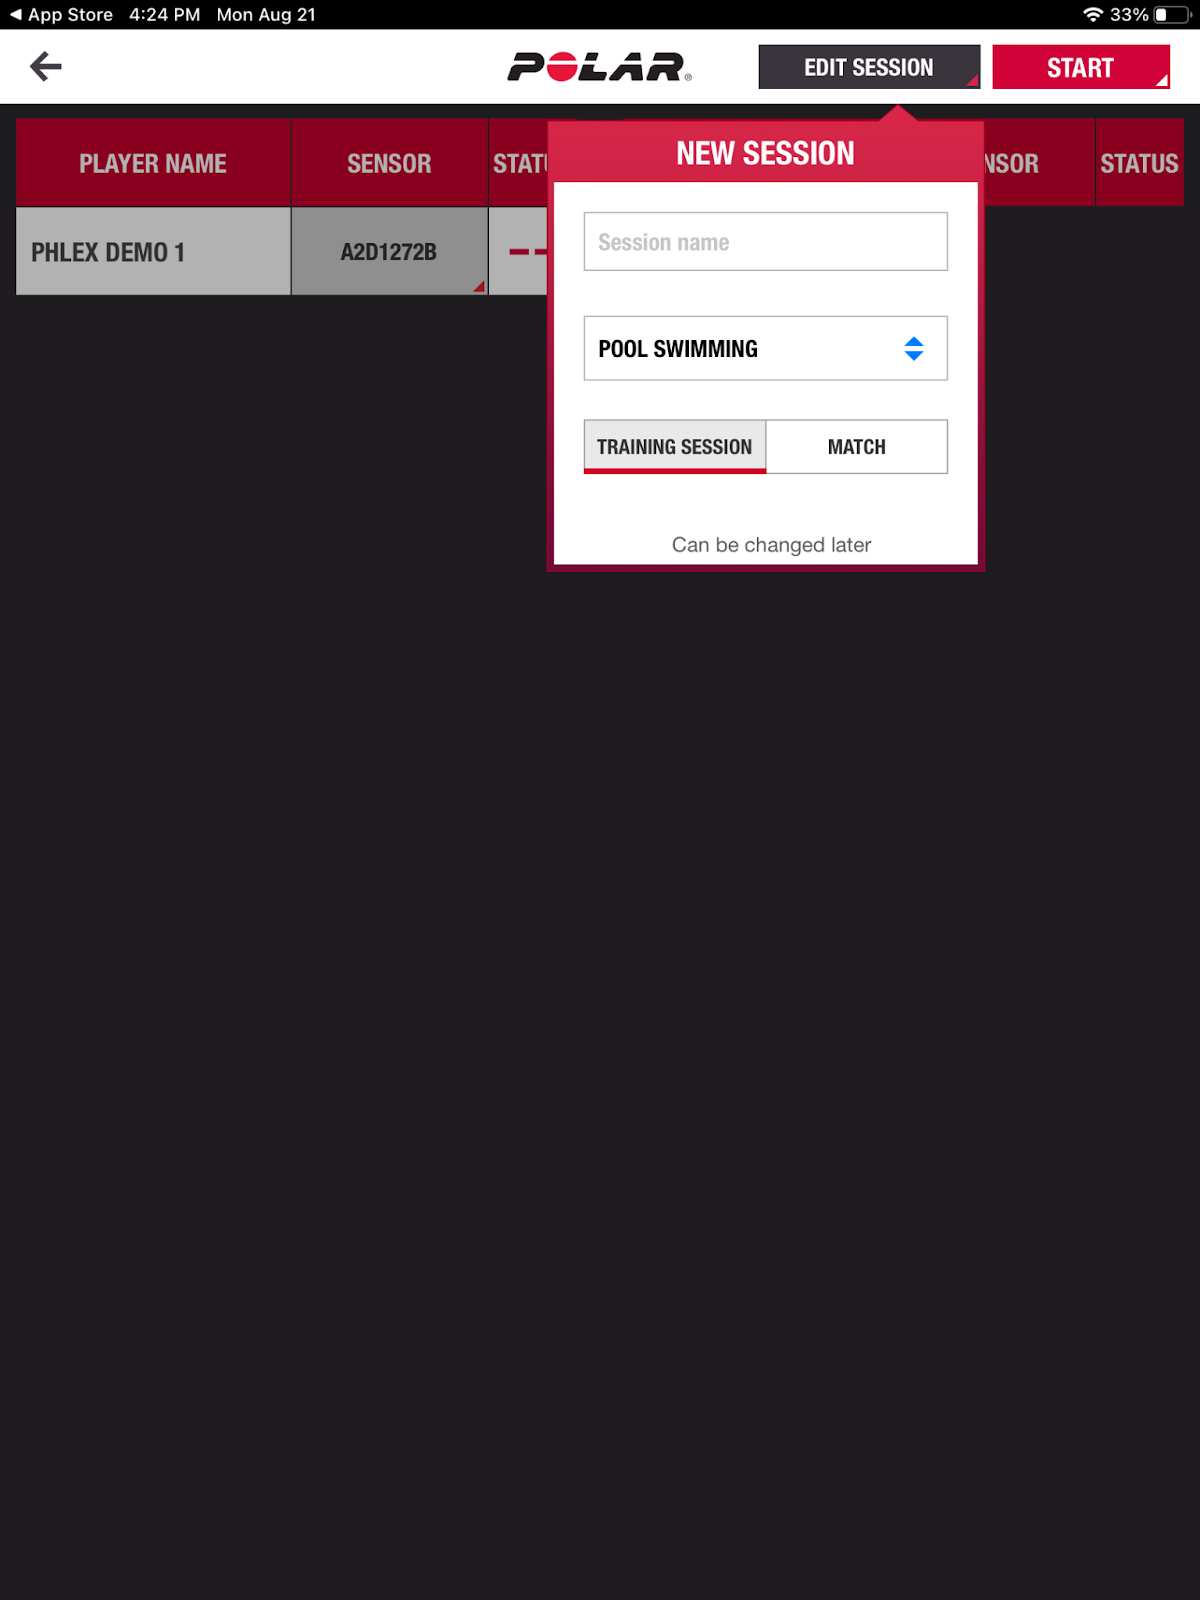
Step 13: Start Your First Training Session
Get your first training session started! After you have added the desired players to your team, select the Home icon in the left sidebar. You will see some details from your team and the current week of training. You will also be able to select player’s individually. In this screen, select “New Session” to get started.
Step 14: Name Your Session
You can name your session, select the sport and if it is during training or competition in the top bar of this screen. Examples of session names are: “Sprint Group Circuit July 12th”, or “Distance group test set 800s 7/15/23”, “Suit Swim Saturday July 15th”.
Step 15: Review Device IDs
After naming your session, click outside of that box and review the device IDs again. If the sensor is not within range or it is off, you will see the status say - - . If the Polar Verity Sense is on and within range, you will see a heart rate value appear under “Status”.

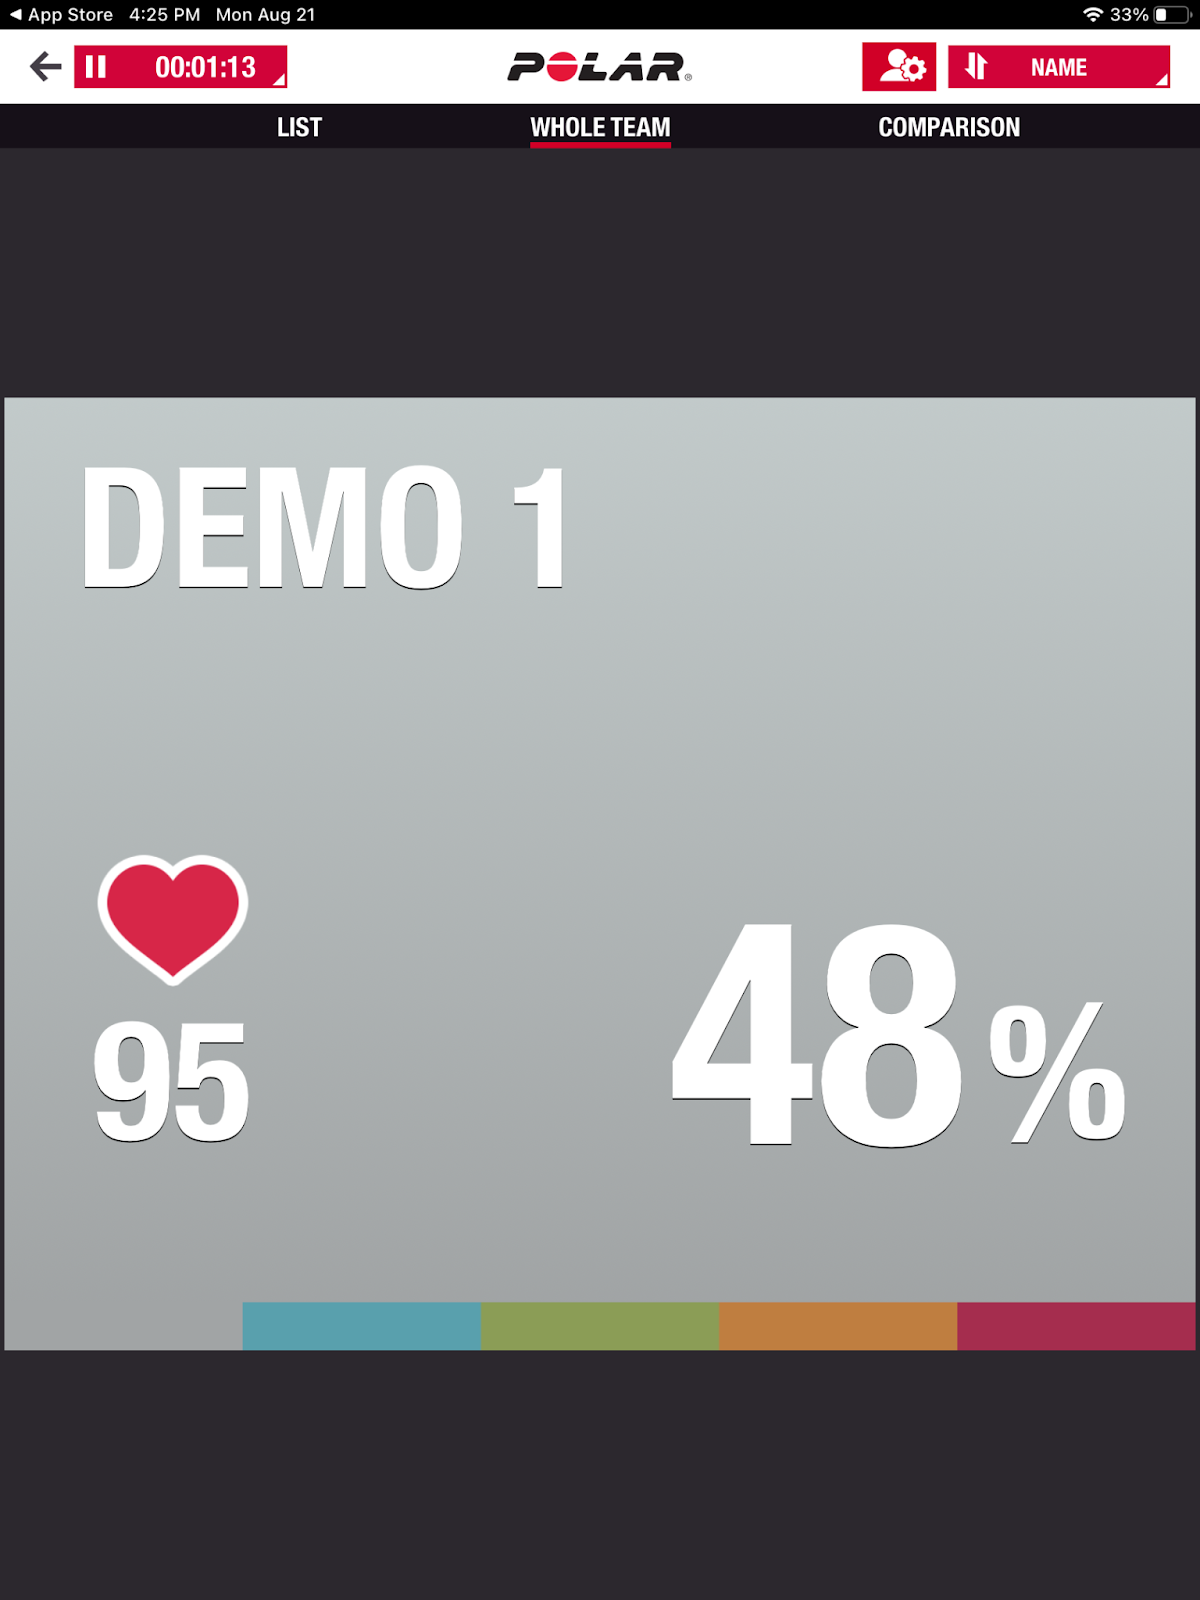
Step 16: Start Your First Training Session
Select “Start” in the upper right hand corner and start your first training session. The first screen you will see is the “Whole Team” view during your session. Every athlete will have a player card, with their name, current Heart Rate and the percentage of Max HR. The colors of the square are based on the zones during player set up. Please refer to Step 8.
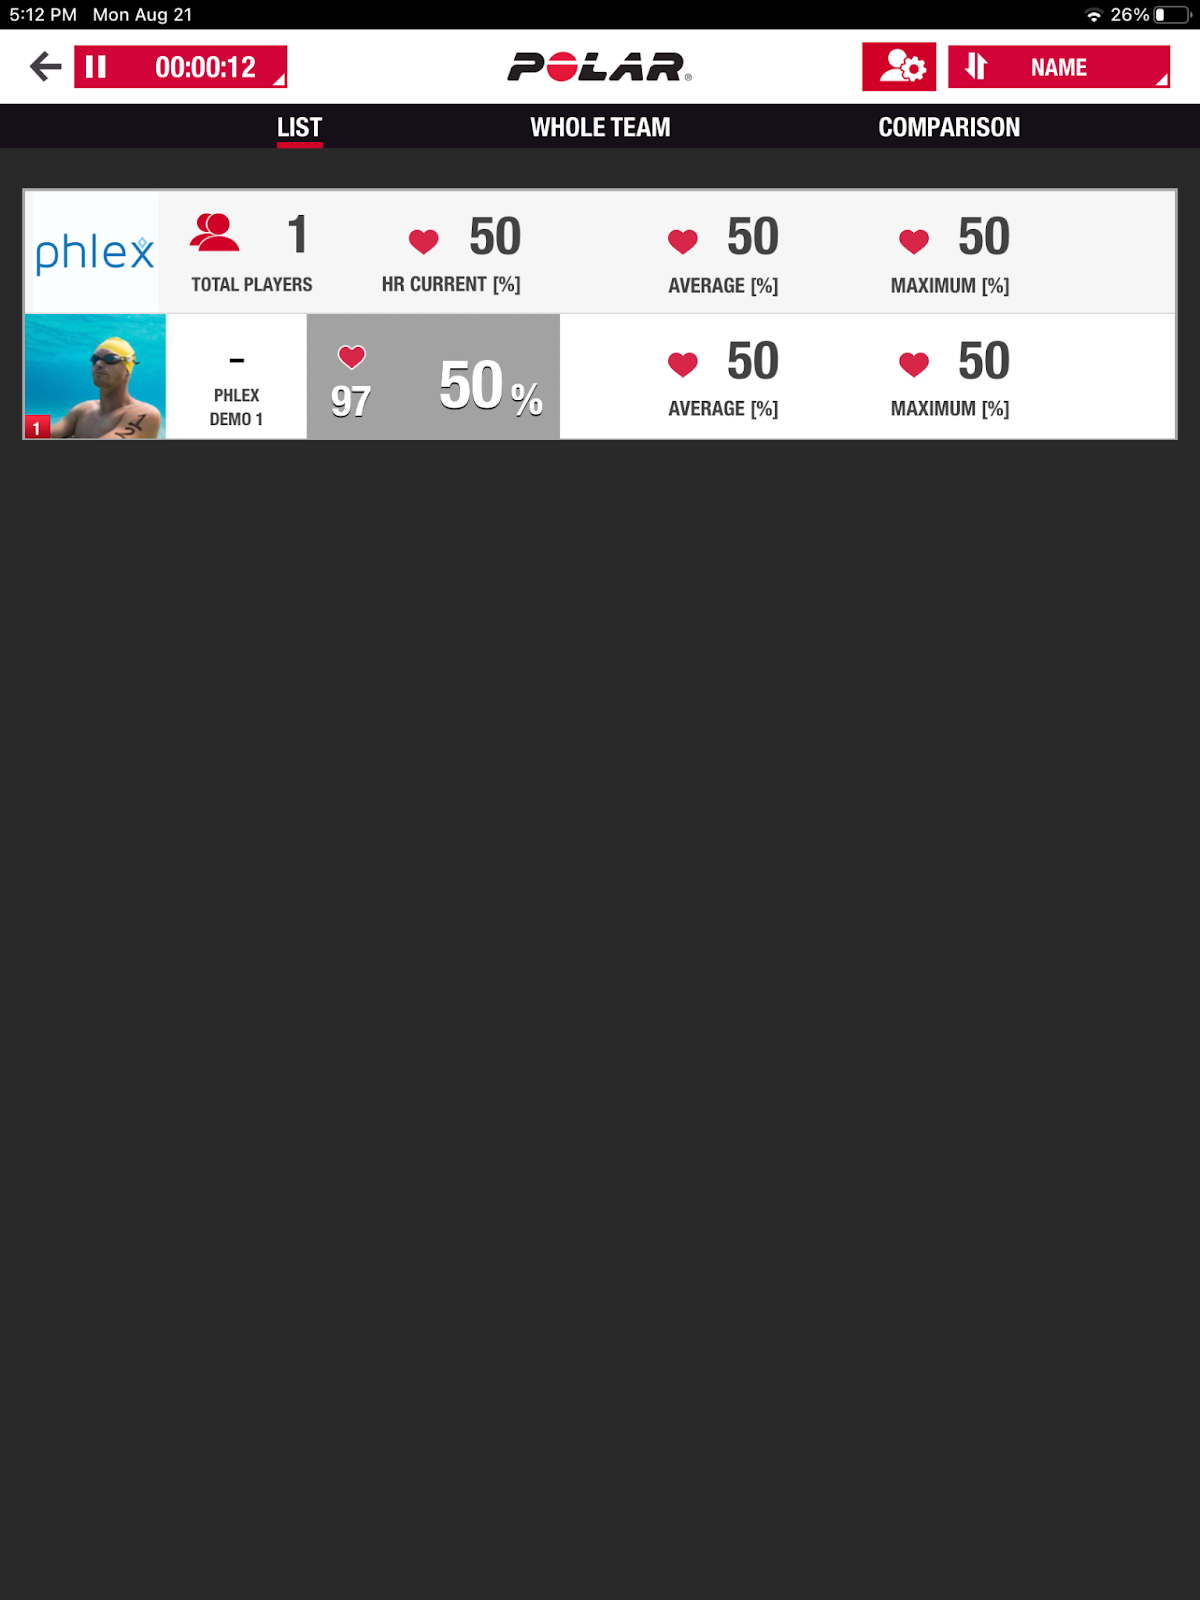
Step 17: View Session Data
During the session, you will be able to view your team two other ways. The “List” view will allow you to view every player in a list. It will include their Current HR, Average HR during the session and Max HR they have hit during the session. The last option is the “Comparison” view where you will be able to select multiple players on your team and compare their heart rate and time in zones.
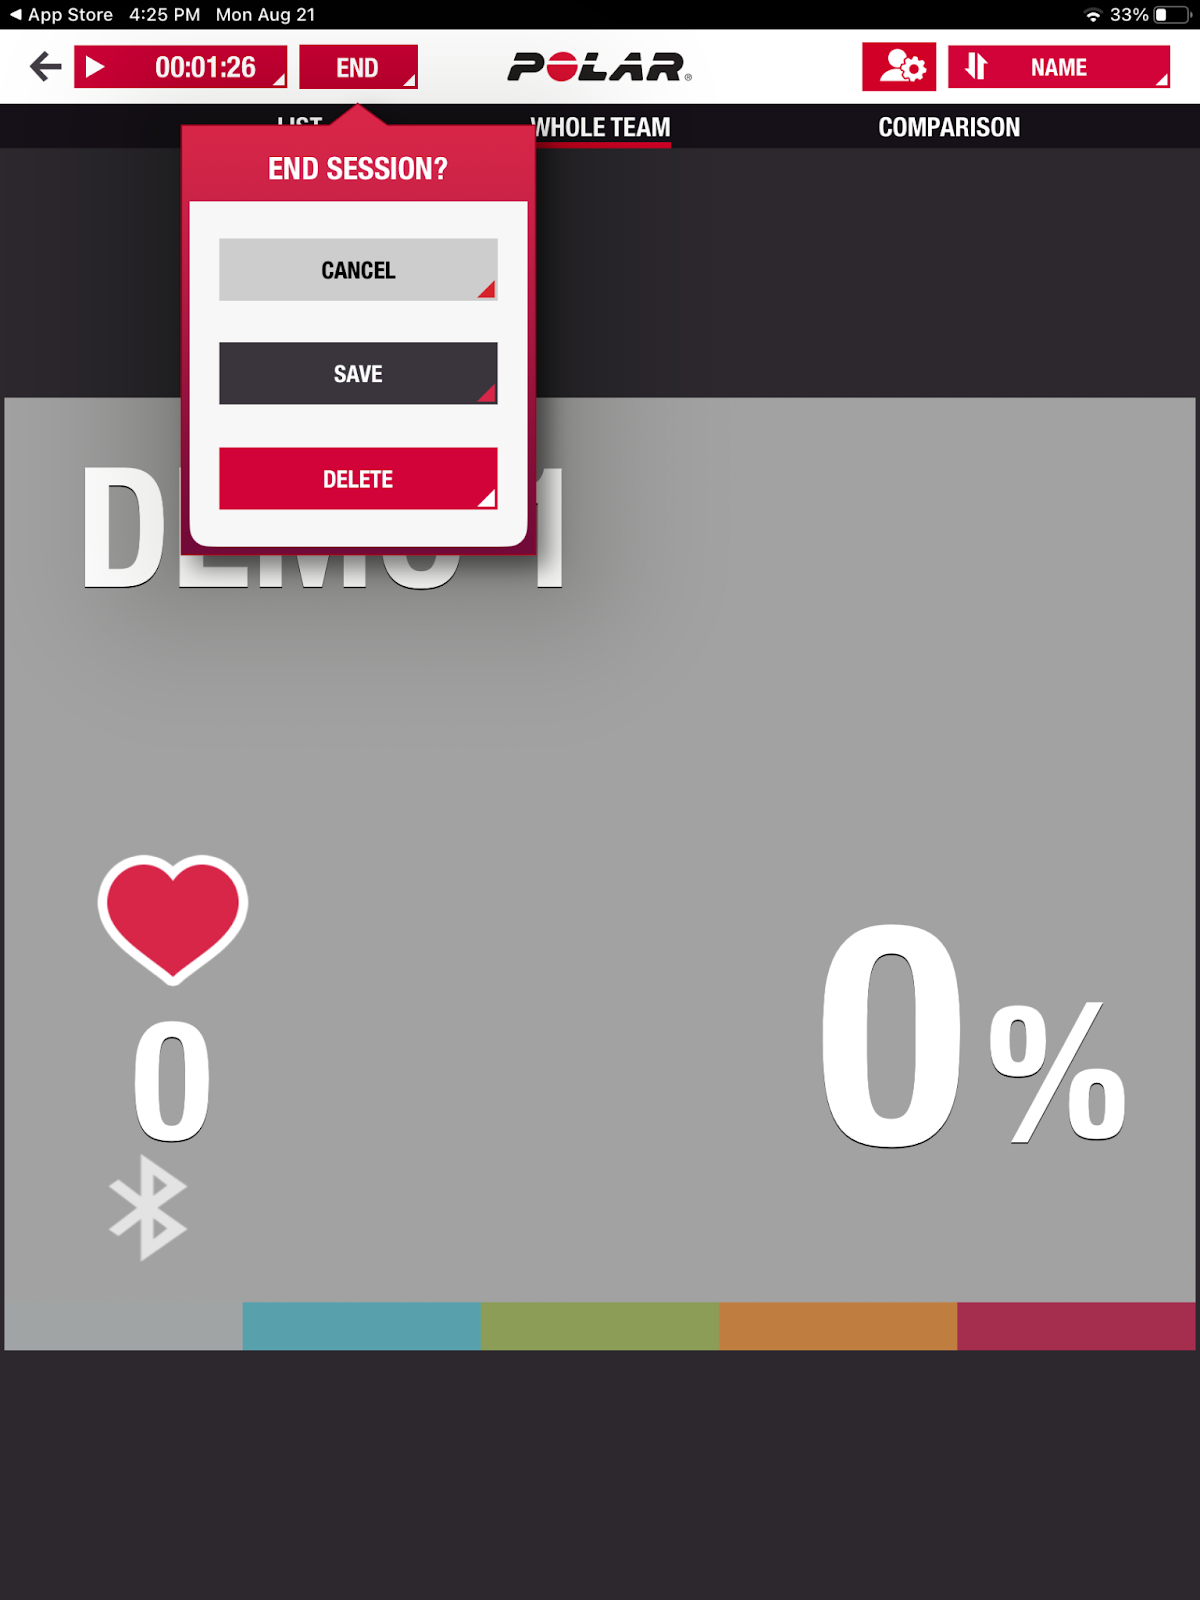
Step 18: Pause or End Session
Pause or End Session. Every session has a timer running in the upper left hand side. If you want to pause the session, click on the running timer. You can resume by clicking the “play” button, or you will now see a pop up option to end the session. If you would like to review the session and store it in your account, please select save.
Conclusion
Setting up the Polar Team App and integrating it with the Polar Verity Sense is a straightforward process that brings a new dimension to swimming training. By following these steps, coaches can have real-time insights into their swimmers' performance, and swimmers can benefit from personalized metrics that help them understand and optimize their performance. With Phlex Swim's technology, we're not just revolutionizing swimming analytics; we're empowering athletes and coaches to achieve their full potential. Start your journey today and see the difference that precise monitoring and analytics can make in your training!


.png)

